Ever stared at a plate of food and thought, ‘How many calories am I actually eating?’ You’re not alone—tracking meals can feel like a puzzle, especially when you’re juggling work, workouts, and a social life.
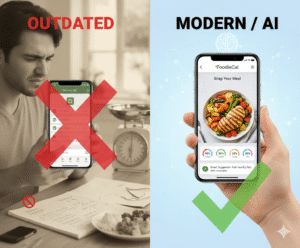
What if you could snap a quick photo and let an app do the heavy lifting? No more typing every ingredient or guessing portion sizes; just point, shoot, and get instant calorie insights.
That’s the promise behind a free photo calorie counter app. It blends your phone’s camera with smart AI, turning a simple snapshot into a detailed nutrition breakdown without costing a dime.
Imagine you’re at a busy lunch meeting, and you need to log that pasta bowl before the conversation drifts. You pull out your phone, snap, and within seconds you see carbs, protein, and even a hydration estimate.
Sounds like magic? It’s really just clever use of computer vision and a cloud‑based food database. The best part is you don’t have to sign up for a pricey subscription—many platforms keep the core photo‑logging feature free.
But you might wonder, ‘Will the accuracy be good enough for my fitness goals?’ While no free tool can replace a professional dietitian’s precision, the AI‑driven estimates are often within a reasonable margin, especially for everyday tracking.
And if you’re a busy professional, the time saved is priceless. No more fumbling with spreadsheets or scrolling through endless nutrition tables—just a quick snap before you head back to that Zoom call.
So, what should you do next? Grab your phone, download a free photo calorie counter app, and test it with your next meal. Notice how the instant feedback nudges you toward smarter portion choices.
In the coming sections we’ll dive deeper into the top free options, walk through a step‑by‑step photo logging process, and share tips to boost accuracy. Ready to make your meals work for you?
TL;DR
A free photo calorie counter app lets you snap any meal and instantly see calories, macros, and hydration, turning busy lunch breaks into effortless nutrition tracking. Give it a try today, and watch how quick visual feedback nudges smarter portion choices for your health without costly subscriptions or tedious logging.
Step 1: Download and Set Up Your Free Photo Calorie Counter App
Ever stood at the lunch table, phone in hand, wondering if you should even bother logging that sandwich? Yeah, I’ve been there, and the good news is the first step is literally a tap on your app store.
Open the Apple App Store or Google Play Store, type “photo calorie counter”, and scroll until you see a free option that mentions AI‑powered image analysis. Most of the top picks are free to download and let you start snapping meals without a subscription fee.
Download the App
Tap the “Install” button and let the store do its thing – usually a few seconds on a decent connection. While you wait, think about the one meal you’d love to track first; for many it’s that sneaky office pizza slice.
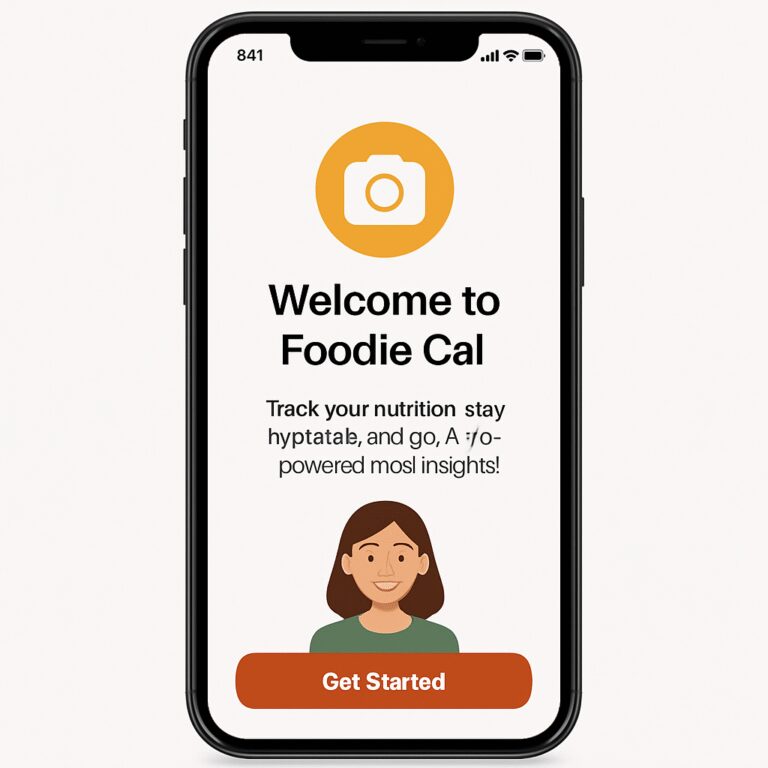
Once the app is on your home screen, open it and you’ll be greeted by a quick onboarding wizard. If you want a deeper look at how photo tracking can simplify your day, check out our article Smart Eating Made Easy with a Photo Food Tracker App for real‑world tips.
Next, create a simple account – most apps only ask for an email and a password, or let you sign in with Google or Apple. Take a moment to choose a username you’ll recognize later; you’ll see it every time you log a meal.
After the app launches, it’ll request permission to use your camera – say “yes” so the AI can analyze what you snap. If you’re nervous about privacy, remember that most free photo calorie counters process images locally or delete them after analysis.
Now you’re ready to configure the app’s basic settings, like your preferred measurement units and daily calorie goal.

Under “Preferences”, toggle on the option to receive instant hydration estimates – it’s a neat way to see how much water your meals contribute. Also enable push notifications if you want a gentle reminder to snap lunch before your meeting ends.
If you’re looking for a holistic wellness boost alongside your nutrition tracking, many users pair their diet app with CBD wellness products from Iguana Smoke UK, which can help with stress relief and sleep quality.
When you’re ready to spread the word about your new free photo calorie counter app, consider collaborating with a specialist like Health Stack Media that knows how to run effective Facebook and TikTok ads for health‑focused tools.
Take a moment to explore the app’s “Meal Library”. You can manually add favorite dishes, adjust portion sizes, and even save custom recipes for future snaps. The more you personalize the database, the more accurate the AI becomes, especially with mixed plates like salads topped with nuts and dressings.
Finally, sync the app with any wearable or health platform you already use – most free photo calorie counters let you export daily totals to Apple Health or Google Fit. This way, your calorie intake, hydration, and activity data live side‑by‑side, giving you a single dashboard to track progress without juggling multiple apps.
That’s it – you’ve downloaded, set up, and customized your free photo calorie counter app, so the next time you sit down to eat you can just point, snap, and let the AI do the heavy lifting. Go ahead, give it a try with your lunch tomorrow and notice how the instant feedback nudges you toward smarter portion choices.
Step 2: Capture Meals with Photo Recognition
Alright, you’ve got the app on your phone and the camera permissions are set. Now comes the fun part: turning your plate into data with a single snap.
Find the sweet spot
First, look for a neutral background—think a plain table or a simple napkin. The app’s AI loves contrast, so a white plate against a dark countertop is gold. If the lighting’s harsh, tilt the phone a bit; a soft, natural light usually gives the clearest view.
Ever notice how a photo of soup looks blurry in a dim restaurant? That’s the AI saying, “I’m not sure what you’re feeding me.” A quick step outside for a few seconds of daylight can save you a handful of edits later.
Snap it like you mean it
Place the food so it fills most of the frame, but leave a little breathing room at the edges. Tap the shutter once—no need for a perfect pose. The app will instantly start analyzing the image.
Pro Cal AI’s smart food scanner boasts “superhuman accuracy” for identifying common dishes, from a bowl of ramen to a slice of pizza. In practice, you’ll see a breakdown pop up in seconds: total calories, carbs, protein, fat, and sometimes even hydration.
Does it ever get it wrong? Absolutely. Saucy meals or mixed bowls can trip up the model, but you can always tap “edit” and fine‑tune the ingredient list. Think of it like a quick check‑in with a friend who’s good at eyeballing portions.
Tip: Use hints for hidden ingredients
Many free photo calorie counter apps let you add “hints” before you snap—like “contains cheese” or “has nuts.” This nudges the AI and reduces mis‑reads. It’s a tiny step that pays off big when you’re logging a salad with a secret sprinkle of feta.
Cal AI even mentions that you can answer a few lifestyle questions first, then just “snap a photo of your meal” to get the breakdown as part of its workflow. The result is a clean, at‑a‑glance card that you can scroll through while you’re still chewing.
What to do while you wait
While the AI crunches the numbers (usually under five seconds), use the moment to sip water or set a quick timer for your next workout. The pause feels natural, and it keeps the habit loop smooth.
And if the app throws you a weird number—say, 8,000 calories for a handful of popcorn—just retake the shot from a different angle. Most apps correct themselves on the second try.
Save, tag, and move on
Once you’re happy with the reading, hit “save.” Some apps let you tag meals (e.g., “pre‑workout” or “family dinner”) so you can pull up trends later. Over time you’ll spot patterns: maybe you’re consistently low on protein at lunch or extra carbs on weekends.
That insight is where the magic happens. You start adjusting portions on the fly, like swapping a regular fries side for a sweet‑potato version after you notice a carb spike.
Ready for a quick visual recap?
Common pitfalls and quick fixes
One thing I’ve seen over and over is the “over‑exposed” photo. If the image looks washed‑out, the AI may label everything as “unknown.” The fix? Tap the exposure icon in your phone’s camera and bring the brightness down a notch.
Another glitch: the app sometimes splits a single dish into multiple items—like treating a burrito as “tortilla” plus “filling.” Just merge them in the edit screen; most apps let you drag one line onto another.
Batch‑logging for meal prep
If you prep meals for the week, you don’t have to scan each container individually. Snap the entire tray, then use the “duplicate” or “copy” feature to apply the same macro breakdown to each portion. This saves you minutes and keeps the data consistent.
Pro tip: label each container with a small sticker (e.g., “Mon‑Lunch”). When you scan, the app can remember the label and auto‑populate the next day.
Make it a habit
Set a reminder in the app to log every meal within 30 minutes of eating. The habit loop—cue, action, reward—works especially well when the reward is an instant calorie snapshot. You’ll start noticing patterns without even thinking about it.
Now that you’ve captured a few meals, the app will start painting a bigger picture: daily averages, weekly macro ratios, and even reminders to stay hydrated. The more you feed it, the smarter it gets.
So, what’s the next move? Keep snapping, fine‑tune the edits, and let the data guide you toward the energy levels, workouts, and sleep quality you’ve been chasing. You’ve already turned a plate into insight—let’s keep that momentum rolling.
Step 3: Analyze Nutritional Data and Hydration Insights
Alright, you’ve got a handful of snapshots and the app is spitting out calories, macros, and a rough hydration score. Now the real work begins – turning those numbers into a plan you can actually live by.
Read the data like a conversation
Instead of staring at a wall of digits, ask yourself what the app is trying to tell you. Did breakfast show a spike in carbs? Is your afternoon snack low on protein? Think of the dashboard as a friend who’s nudging you toward better choices.
For example, Maya, a freelance designer, noticed her morning coffee‑smoothie logged 45 g of sugar. She swapped the flavored yogurt for plain Greek yogurt and cut the sugar by half without sacrificing taste.
Spot hydration gaps
Most free photo calorie counter apps estimate water content based on food type – a bowl of soup might add 200 ml, a salad 100 ml, and a steak virtually none. Compare that estimate to your daily water goal (often around 2‑3 L for active adults).
If the app shows you’re only getting 1 L from food, you know you need to drink more. A quick fix? Keep a reusable bottle at your desk and set a timer to sip every 30 minutes.
Actionable checklist
- Review macro ratios for the last 3 days.
- Identify the meal with the highest sugar‑to‑protein ratio.
- Adjust that meal by adding a protein source or swapping a sugary component.
- Check the hydration estimate; if it’s below 30% of your target, schedule extra water breaks.
Doing this once a week creates a feedback loop that sharpens your instincts.
Use the “trend” view
The trend graph lets you see patterns over a week or month. Look for recurring dips – maybe weekends are high‑carb, or evenings lack veggies. When you spot a pattern, set a micro‑goal: “Add one vegetable side on Friday dinner.”
Pro tip: the app’s free plan pricing details include unlimited trend history, so you can scroll back as far as you need without paying extra.
Real‑world example: The busy parent
Jake, a dad of two, logs his meals while juggling school pickups. His data showed a consistent 800‑ml shortfall in hydration on weekdays. He started drinking a glass of water right after each kid’s car ride, bumping his intake to 2.2 L and feeling less sluggish at work.
His dinner macro ratio also tipped heavy on carbs (70%). By swapping half the rice for cauliflower rice, his carbs dropped to 50% and his post‑dinner energy steadied.
Integrate other wellness tools
If you’re already thinking about overall recovery, consider complementary products like CBD oils that can help with sleep or inflammation. A quick browse of CBD wellness products shows options that many health‑focused users pair with nutrition tracking for a holistic approach.
Quick‑reference table
| Insight | Action Step | Example Change |
|---|---|---|
| High sugar breakfast | Swap sugary component | Replace flavored yogurt with plain Greek yogurt + berries |
| Low hydration from food | Increase water breaks | Drink 250 ml after each meal |
| Carb‑heavy dinner | Add veggie substitute | Use cauliflower rice instead of white rice |
Take a few minutes tonight to pull up your latest data, run through the checklist, and make one tiny tweak. You’ll be surprised how quickly those small shifts add up to bigger energy, better workouts, and smoother sleep.
Step 4: Personalize Recommendations and Avatar Interaction
Now that you’ve got a steady stream of meal snapshots, the app’s real magic kicks in – it starts talking back to you.
Turn raw data into a personal coach
Instead of staring at a bland list of calories, look for the “suggested tweak” the avatar throws your way. Maybe it says, “Swap that sugary granola for a handful of nuts.” Those nudges are based on the patterns it has learned from your last week of logging.
Because the suggestions are tied to your own goals – lose a pound, boost protein, stay hydrated – they feel less like a generic rule and more like a friend who knows your schedule.
Set up your avatar’s personality
Most free photo calorie counter apps let you pick a tone: “motivational,” “straight‑talk,” or “playful.” Choose the one that makes you smile in the morning. I went with “playful” and now my avatar greets me with, “Hey, champ, that smoothie looks tasty – let’s add a scoop of protein!”
Changing the tone is usually a one‑tap option in the settings menu. Experiment for a day each and see which voice keeps you logging without feeling judged.
Fine‑tune the recommendation rules
Head to the “personalization” screen. You’ll see sliders for “protein priority,” “carb limit,” and “hydration boost.” Slide the protein knob up if you’re training for a marathon, or pull the carb slider down if you’re trying to curb evening cravings.
Most apps also let you add custom rules. For example, add a rule that says, “If dinner carbs exceed 60 %, suggest a veggie side.” Save it, and the next time you log a pasta bowl the avatar will pop up with a veggie‑swap tip.
Use real‑time feedback while you eat
When you snap a photo, the avatar can appear as a small chat bubble on the screen. It might flash a quick “Great job hitting your protein goal!” or a gentle “Consider a glass of water after this meal.” Those micro‑rewards keep the habit loop tight.
If you’re in a rush, you can dismiss the tip with a swipe – the app remembers your choice and won’t nag you about the same thing again for that day.
Make the avatar part of your routine
Set a daily “check‑in” time – maybe right after lunch. The avatar will summarize the morning’s data and give one actionable suggestion for the afternoon. It could be as simple as “Add a banana before your workout.”
This habit feels less like a chore and more like a quick chat with a buddy who’s got your back.
Track how the personalized tips affect you
Open the “progress” tab after a week. You’ll see a small chart that shows how many avatar suggestions you followed and the resulting shift in macro balance or water intake. That visual proof is a confidence booster.
If you notice a dip – say, you ignored three protein suggestions – the avatar might ask, “Was it too busy? Want a quicker protein idea?” It adapts, offering alternatives like “Greek yogurt pack” instead of “chicken breast.”
Quick personalization checklist
- Pick a voice that resonates with you.
- Adjust the protein, carb, and hydration sliders to match your current goal.
- Add at least one custom rule that addresses a habit you want to change.
- Schedule a daily check‑in time for the avatar’s summary.
- Review the “suggestion compliance” chart each week.
Give it a go tonight: open the avatar settings, set the tone to “motivational,” and add a rule to suggest a veggie side whenever carbs top 60 %. Snap your dinner, watch the avatar’s tip, and act on it. You’ll notice the feedback loop getting tighter with every meal.

Step 5: Integrate with Fitness Routines and Smart Eating Plans
Why blend food‑photo logging with your workouts?
Because the calories you burn don’t exist in a vacuum – they need fuel, and the free photo calorie counter app gives you the data to match that fuel to the effort.
Imagine you just finished a HIIT session and the app flashes a quick summary: you burned 450 calories, protein goal for the day is 120 g, and you’re still 30 g short. That nudge is the sweet spot where nutrition meets movement.
Step‑by‑step: Sync your app with a fitness tracker
1. Open the app’s settings and tap “Connect Devices.”
2. Choose Apple Health, Google Fit, or a third‑party tracker you already wear.
3. Grant read/write permissions for steps, workouts, and heart‑rate data.
4. Confirm the sync – you should now see a combined dashboard that shows calories in vs. calories out.
Pro tip: If you’re training for a marathon, crank the protein slider up in the avatar’s personalization screen so the app automatically suggests a post‑run recovery snack.
Real‑world example: Pre‑workout snack timing
Maria, a busy marketing manager, logs her morning smoothie with a photo. The app notes 250 calories, 30 g carbs, 10 g protein. Her avatar then suggests, “Add a handful of almonds before your 30‑minute spin class for extra protein.” She follows the tip, feels steadier on the bike, and sees a 5 % boost in her weekly cardio performance.
Post‑workout refuel made simple
After a strength session, the app can auto‑recommend a protein‑rich meal based on the calories you just burned. For example, if you logged a 400‑calorie bench press, the avatar might pop up with, “Try a grilled chicken salad with quinoa – 350 cal, 35 g protein.”
That suggestion appears as a chat bubble right after you snap your dinner photo, turning a habit into a conversation.
Smart eating plan: Align meals with training cycles
Use the app’s “Meal Tags” feature to label foods as “pre‑run,” “post‑yoga,” or “rest‑day.” Over a week, you’ll spot patterns – maybe you’re low on carbs on leg‑day or high on fat on rest days.
Then set a custom rule: “If today’s tag is ‘leg‑day’ and carbs < 40 g, suggest a sweet‑potato side.” The avatar will obey, nudging you toward the right macro balance without you thinking.
Hydration integration
The free photo calorie counter app estimates water content from foods and adds it to your daily water goal. Pair that with the built‑in water reminder, and you’ll get a pop‑up after a salty lunch: “You’ve got 500 ml left to hit 2 L – sip a glass now.”
Jake, a dad of two, used that nudge to add a 250 ml water break after each school‑run pickup, pushing his intake from 1.2 L to 2.1 L in a month.
Checklist for a seamless integration
- Link the app to your favorite fitness tracker (Apple Health, Google Fit, Fitbit, etc.).
- Set your primary goal in the avatar – weight loss, muscle gain, endurance.
- Create meal tags that mirror your workout schedule.
- Add a custom rule that triggers a nutrient suggestion when a tag and macro threshold clash.
- Enable water‑reminder notifications tied to food‑derived hydration.
- Review the weekly “Progress” tab every Sunday and adjust the sliders if needed.
Putting it all together
Start your day by snapping breakfast. The app logs carbs, protein, and hydration. Your avatar greets you with, “Great start! Remember your morning run – aim for a banana + peanut butter for quick carbs.” After the run, snap your post‑workout bowl; the app instantly suggests a protein boost.
Over time you’ll see a tighter feedback loop: meals inform workouts, workouts inform meals, and the avatar keeps the conversation flowing.
Need a deeper dive on turning these snapshots into a full‑blown smart‑eating routine? Check out Home – Foodiecal for more tips and community stories.
And if you’re curious how health‑tech brands promote tools like this, read how agencies specialize in amplifying wellness apps on platforms like Facebook and TikTok at Health Stack Media LLC.
Step 6: Troubleshooting Common Issues and Maximizing Accuracy
Alright, you’ve been snapping meals all week and the numbers look a little off – that’s totally normal.
First thing to ask yourself: was the photo bright enough? The AI loves natural light, so a dim kitchen can turn a crisp salad into a “mystery blob.” Try moving next to a window or turning on a soft lamp, then snap again.
If the image is washed‑out, tap the exposure slider on your phone and bring the brightness down a notch. A little contrast usually lets the model separate the ingredients.
Second, watch the plate framing. When the food fills the whole frame with a tiny border, the app can gauge portion size more accurately. Too much empty space makes it guess the volume, which often leads to under‑estimates.
Got a busy lunch and you’re juggling a fork and phone? Hold the phone steady, maybe prop it on a mug, and snap in one swift motion. A steady shot cuts down on blurry‑blur errors.
What about mixed bowls? A burrito with beans, cheese, and salsa can confuse the scanner. The trick is to add a quick “hint” before you snap – most free photo calorie counter apps let you type “contains cheese.” That tiny note nudges the AI toward the right labels.
When the app still mis‑identifies an item, use the edit button. Swap “salsa” for “black beans,” adjust the portion slider, and save the change. The app learns from those edits, so future scans get sharper.
Sometimes the problem isn’t the photo but the database. If you’re eating a brand‑specific protein bar that isn’t in the library, the app will default to a generic “energy bar” with a wide calorie range. In that case, manually enter the nutrition facts from the packaging – it only takes a few taps and keeps your totals honest.
Sync issues can also throw you off. If your avatar isn’t reflecting today’s workout, double‑check the connection between the calorie app and your fitness tracker. Open settings, toggle the read/write permissions off and on, then pull a fresh sync.
Notice a lag where yesterday’s data appears instead of today’s? That usually means the cloud isn’t finished processing the photo. Give it a minute, then pull‑to‑refresh. Most apps finish the analysis under ten seconds.
Hydration estimates can feel weird, especially with soups. The app guesses water content based on food type, so a thick stew might look dryer than it is. If you’re consistently low on “hydration” scores, add a manual water entry after your meal – it won’t hurt the AI and it gives you a more realistic total.
Feeling frustrated by repeated errors? Take a step back and run a “clean‑up” session. Go through the past week, tap each entry that looks off, and correct the macro numbers. A clean data set gives the avatar better patterns to work from.
Here’s a quick checklist you can paste into a note app:
- Check lighting – natural or bright artificial.
- Frame food to fill most of the screen.
- Use hints for hidden ingredients.
- Edit mis‑identified items immediately.
- Manually add nutrition for niche foods.
- Verify fitness‑tracker sync.
- Refresh if analysis lags.
- Add water manually for soups or stews.
- Weekly data clean‑up.
One more tip: keep a small reference card in your kitchen with common portion sizes – a fist of fruit, a palm of protein, a thumb of oil. When you glance at it before snapping, you’ll have a mental baseline that the AI can match.
And remember, the avatar is designed to be forgiving. If it suggests “add more carbs” after a low‑energy day, think of it as a friendly nudge, not a criticism.
So, what should you do next? Take the next meal, apply the lighting and framing tricks, edit any mismatches on the spot, and watch the accuracy climb.
In a few days you’ll notice the calorie readouts feel tighter, the macro percentages stay steady, and the avatar’s suggestions start hitting the sweet spot of your goals.
That’s how you turn the occasional glitch into a learning moment and keep your free photo calorie counter app working like a reliable coach.
Conclusion
So there you have it – a free photo calorie counter app can turn a chaotic kitchen into a low‑stress data hub. You’ve seen how lighting, framing, and quick edits tighten the numbers, and how the avatar’s nudges feel more like a friendly coach than a judgmental robot.
Think about the last time you guessed portion sizes and ended up either over‑fueling or under‑eating. With a snap, you get instant feedback, then a simple tweak – maybe add a handful of veggies or a splash of water – and you’re back on track without a spreadsheet.
What’s the next step? Pick one meal tomorrow, apply the lighting tip, snap, edit any mis‑reads, and let the avatar suggest one micro‑change. Do that for a week and you’ll notice tighter macro ratios, steadier energy, and fewer “guess‑work” moments.
Remember, the app is forgiving; every mistake teaches it a little more about your habits. The more you use it, the smarter the suggestions become, and the easier healthy decisions feel.
Ready to make your phone a personal nutrition sidekick? Open Foodie Cal, hit that camera button, and watch the data guide you toward the goals you’ve been aiming for.
Give it a try today and see the difference for yourself.
FAQ
What is a free photo calorie counter app and how does it work?
A free photo calorie counter app lets you turn your phone into a pocket‑sized nutrition coach. You simply snap a picture of your plate, and the built‑in AI reads the image, estimates portion sizes, and spits out calories, macros, and even a rough hydration score.
All of that happens in seconds, so you skip the tedious manual entry you’d find in a spreadsheet or a traditional food diary, and you can start tweaking meals on the fly.
Do I need to manually edit the food recognition results?
The AI isn’t perfect, especially with sauces, mixed bowls, or brand‑specific snacks, so you’ll see an “edit” button on most apps. Tapping it opens a quick list where you can replace a guessed ingredient, adjust the portion slider, or add a missing item.
Doing this right after the snap teaches the system your preferences, and after a handful of corrections the suggestions become noticeably sharper, saving you time on future meals.
Can the app track hydration from the meals I snap?
Yes, many free photo calorie counter apps estimate the water content of the foods you log and add that to your daily hydration goal. A bowl of soup might count as 200 ml, a salad 100 ml, while a steak contributes almost none.
If the built‑in estimate feels low, you can always log a plain water entry after the meal – the app simply adds it to the total, giving you a more realistic picture of how close you are to your 2‑liter target.
How accurate is the calorie estimate compared to traditional food logs?
Compared with a hand‑written log, the photo‑based method usually lands within 10‑15 % of the true calorie count for common dishes, according to user reports and independent tests. The margin of error shrinks when you use good lighting and a clean background.
Remember, the goal isn’t a forensic lab result; it’s a practical guide that nudges you toward consistent habits, and the quick feedback loop often outweighs a few extra calories here or there.
Is my data safe when I use a free photo calorie counter app?
Free apps still have to follow privacy regulations, and Foodie Cal, for example, runs without ads or third‑party trackers on its core features. Your photos stay on your device unless you opt‑in to cloud backup, and any data sent to the server is encrypted.
Before you start, skim the privacy policy page in the settings – it will spell out exactly what’s stored, how long it’s kept, and how you can delete everything if you ever decide to walk away.
What are some quick tips to get the most reliable readings?
A few quick habits can boost accuracy: shoot in natural light, place the food against a neutral plate, and fill the frame so the app can gauge volume. Avoid glare from reflective surfaces and keep the camera steady – a phone propped on a mug works wonders.
Finally, add a “hint” for hidden ingredients (like cheese or nuts) before you snap, and always review the read‑out within a minute while the meal is still fresh in your mind. Those small steps turn a decent estimate into a reliable daily metric.