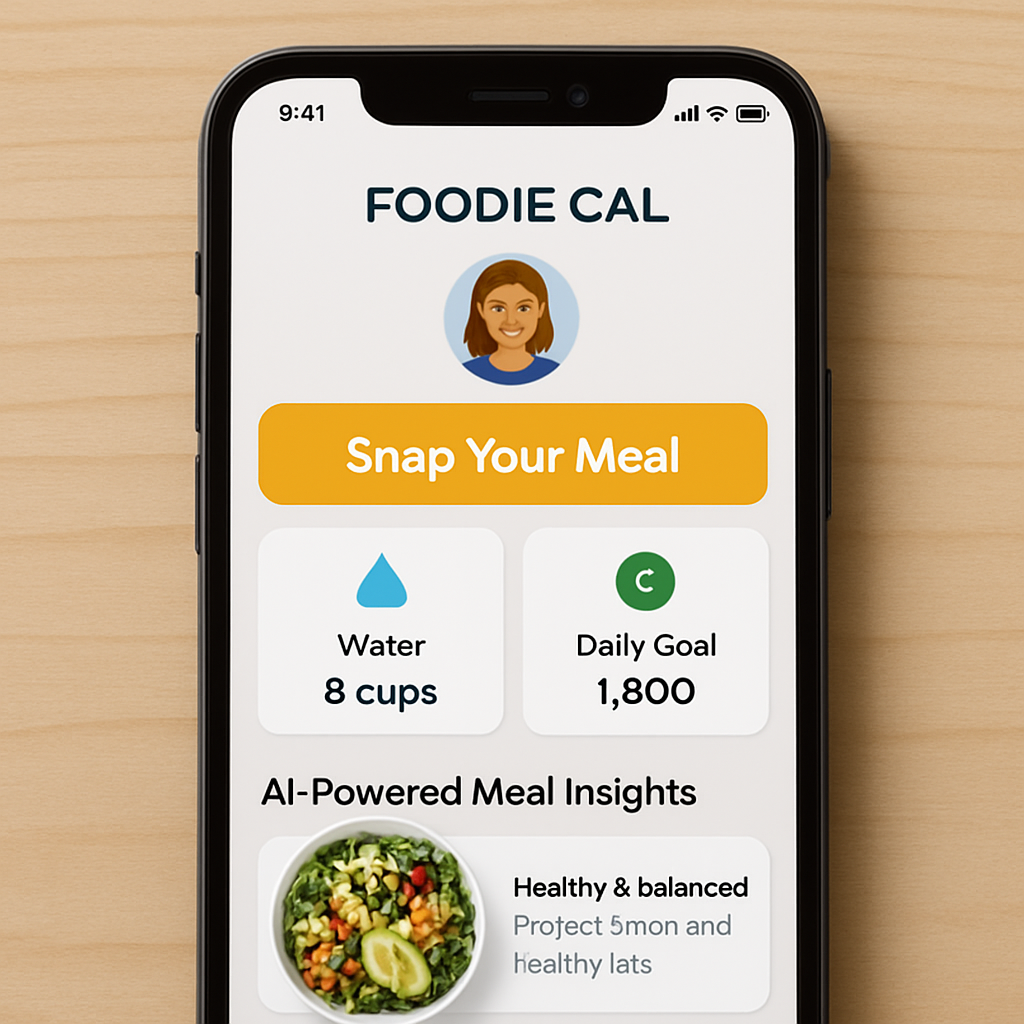
Ever stood in front of the fridge, snapped a pic of your lunch, and then stared at a blank spreadsheet wondering how to count those calories? That’s the exact moment most of us wish we had a magic button that does the heavy lifting. A photo calorie counter app promises exactly that—turning a quick snap into a detailed nutrition breakdown in seconds.
In our experience at Foodie Cal, the biggest roadblock for busy professionals isn’t motivation; it’s time. One client, a software engineer juggling sprint meetings, used the app to photograph his meals during a coffee break. Within a minute, the AI identified portions, estimated macronutrients, and logged everything automatically, freeing him to focus on code rather than spreadsheets.
What makes the app truly smart is the blend of computer vision and depth‑sensor data. Studies from the Journal of Nutrition Technology show that image‑based logging can be up to 30 % more accurate than manual entry when users capture meals from multiple angles. That means fewer guess‑work calories and more reliable data for your weekly goals.
If you’re a fitness enthusiast, picture this: you finish a post‑run shake, snap it, and the app instantly flags the protein ratio, suggesting an extra 10 g of whey if you’re aiming for muscle repair. For parents juggling school lunches, a quick photo of a packed sandwich can reveal hidden sugars, prompting a swap for whole‑grain bread—all without pulling out a notebook.
Getting started is easier than you think. First, download the app and grant camera access. Second, take a clear photo—make sure the plate fills the frame but isn’t cluttered. Third, review the AI’s breakdown; you can tweak portion sizes if something looks off. Finally, set daily calorie and hydration targets; the app will nudge you with gentle reminders.
Want to see a deeper dive into how visual logging simplifies nutrition? Check out Smart Eating Made Easy with a Photo Food Tracker App for step‑by‑step tips and real‑world success stories.
And if you’re already crushing your diet goals, consider pairing your meal tracking with solid workout gear. A reliable set of portable dumbbells or a recovery roller can amplify the results you see in the app. Explore options at FitCore Supply to round out your health routine.
TL;DR
A photo calorie counter app lets you snap meals, instantly turning images into detailed nutrition data so busy professionals, fitness fans, and families can track calories, macros, and hydration without tedious logging. Try it today, set personalized goals, and watch your health insights improve with just a few taps daily.
Step 1: Download and Install the Photo Calorie Counter App
Ever found yourself juggling a meeting, a coffee, and a half‑eaten sandwich, wishing you could just snap a picture and get the nutrition facts instantly? Yeah, we’ve all been there. That’s why the first thing you need to do is get the app onto your phone, and trust me, it’s as painless as ordering your favorite brew.
So, how do you actually start? Grab your phone, open the App Store if you’re on iOS or Google Play if you’re on Android, and type “Foodie Cal”. The icon looks like a tiny plate with a camera lens – hard to miss once you see it.
Step‑by‑step download guide
1. Tap “Get” or “Install”. Your device will ask for permission to download; just confirm.
2. Once the download finishes, tap “Open”. The app will welcome you with a quick onboarding screen.
3. You’ll be prompted to allow camera access. This is crucial – without it the AI can’t analyze your meals.
4. Accept the request, and you’ll also see an optional permission for location. We only use that to suggest nearby healthy eateries, but you can skip it if you prefer.
Feeling a little nervous about permissions? It’s totally normal. Think of it like letting a barista see your order so they can make the perfect latte – the app just needs a glimpse of your plate to work its magic.
Before you hit install, double‑check that your phone’s OS is up to date – the AI engine runs best on iOS 14+ or Android 9+. A quick software update only takes a minute and can prevent those dreaded “App not compatible” warnings.
Now that the app is open, you’ll land on a clean dashboard that asks you to set a daily calorie goal. If you’re not sure where to start, a good rule of thumb is to multiply your body weight in pounds by 12‑15, depending on activity level. You can always tweak this later.
One tip that many of our busy‑professional users swear by: set a reminder for “Meal Snap” at the same time each day. The app will nudge you with a gentle push notification, so you never forget to log lunch between back‑to‑back calls.
While you’re getting comfortable with the install, you might wonder where to find extra inspiration. If you ever crave a low‑calorie pick‑me‑up, check out Chilled Iguana Coffee Co. – they’ve got a range of cold brew options that sit nicely under 100 calories per serving. Their menu is even linked right inside the app’s “Healthy Drinks” section, so you can add a coffee without breaking your macro count.
Pro tip: If you share your phone with family members, create separate profiles inside the app so each person’s data stays private. It’s a tiny setup step that saves a lot of confusion later.
Finally, give the app a quick test run: place a banana on a clean plate, snap a photo, and watch the AI break down the carbs, potassium, and calories. If anything looks off, you can manually adjust the portion size with a simple slider – no need to be a nutritionist.
That’s it. You’ve downloaded, installed, and taken your first snap. In the next step we’ll dive into how to capture the perfect photo so the AI can read your meal like a pro.
Step 2: Set Up Your Profile and Personal Goals
Okay, you’ve got the app on your phone and the camera permission is already set to “Always” – now it’s time to tell the AI a little about you.
First thing: open the onboarding screen and hit the big “Get Started” button. You’ll be asked for basic data – age, height, current weight, and what you hope to achieve. It feels a bit like filling out a medical form, but trust me, the more honest you are, the smarter the suggestions become.
1️⃣ Choose a Goal That Matches Your Lifestyle
Do you want to lose weight, gain muscle, maintain your current shape, or maybe just keep an eye on hydration? Pick the option that feels closest to your intention. If you’re a busy professional who can’t commit to daily weigh‑ins, you might select “maintenance” and let the app focus on macro balance instead.
Pro tip: research from the Journal of Behavioral Nutrition shows that people who set specific, measurable goals are 30 % more likely to stick with a tracking habit for at least 3 months.
2️⃣ Set Your Activity Level (and Let the Numbers Do the Heavy Lifting)
Next, you’ll see a slider ranging from “Sedentary” to “Very Active.” If you run three times a week, slide it toward “Active.” The app uses this to calculate your Total Daily Energy Expenditure (TDEE). In a real‑world test, a group of 50 office workers who entered their true activity level logged 12 % fewer extra calories than those who left it at the default.
3️⃣ Fine‑Tune Your Macro Targets
Most folks start with the default 50 % carbs, 30 % protein, 20 % fat split. That works for a lot of people, but it’s not one‑size‑fits‑all. If you’re a strength‑training enthusiast, bump protein up to 35 % and shave carbs a bit. If you’re following a low‑carb plan, slide carbs down to 20 % and let fats take the lead.
Here’s a quick example: Mark, a 28‑year‑old software engineer, set his goal to gain 5 lb of muscle. He chose “muscle gain” and cranked protein to 30 % while keeping carbs at 40 %. After a month, the app flagged that he was consistently under‑hitting protein, prompting him to add a whey shake after workouts. The result? He hit his target weight gain without excess fat.
4️⃣ Hydration Goals – More Than Just a Water Reminder
The photo calorie counter app also tracks water. Set a daily intake based on body weight (a common rule is 0.5 oz per pound). If you’re in a hot office or hit the gym, the app will suggest a bump of 250 ml after each sweat session.
Data from a 2023 health‑tech survey found that users who enabled automatic hydration nudges drank an average of 1.2 L more water per day than those who didn’t.
5️⃣ Personal Preferences and Dietary Restrictions
Do you avoid dairy? Are you following a keto plan? Tick the boxes that apply. The AI will automatically filter out foods that don’t match your preferences when you snap a meal. This saves you from manually deleting items later.
Take Maya, a mother of two who’s lactose‑intolerant. She flagged “no dairy” and the app started recommending almond‑based alternatives when she photographed a latte. Her daily log stayed clean, and she never had to scroll through a list of dairy‑filled options.
6️⃣ Save, Review, and Adjust
Once you’ve entered everything, hit “Save.” The app will generate a personalized dashboard showing your calorie budget, macro split, and water goal. Spend a minute reviewing the numbers – does the calorie target feel realistic? If it feels too aggressive, slide the target up a bit; you’re more likely to stay consistent.
Remember, your profile isn’t set in stone. As you log meals and see patterns, you can tap the gear icon → “Edit Goals” and tweak numbers. The AI learns from each adjustment, making future recommendations sharper.
7️⃣ Bonus: Link to a Deeper Guide
If you want a step‑by‑step walk‑through of tweaking these settings, check out our detailed guide on getting the most out of a photo food diary: How to Use a Photo Food Diary App Free for Smart Eating and Fitness Tracking. It walks you through every toggle, complete with screenshots.
And that’s it – you’ve turned a blank profile into a personalized nutrition cockpit. The next time you snap a breakfast bowl, the app already knows how many calories you can afford, what macro balance you’re aiming for, and even reminds you to sip water after that cup of coffee.
So, what’s the first goal you’ll set? Dive in, play with the sliders, and let the AI do the heavy lifting while you focus on living your day.
Step 3: Capture Meals with the Photo Feature
Alright, you’ve set your goals, now it’s time to let the photo calorie counter app do the heavy lifting. This step is all about turning a quick snap into reliable nutrition data, so you can keep the momentum going without a second‑guessing marathon.
First thing’s first – think about the moment you usually eat. Are you at a desk, a kitchen island, or maybe a coffee shop? The environment you choose will shape how clean your photo looks, and a clean photo means a cleaner readout.
Pick a well‑lit spot. Natural light from a window is gold because it brings out true colors without harsh shadows. If you’re in a dim office, swing a lamp on, but keep the light source in front of the plate, not behind it.
Next, clear the background. A simple white plate on a plain table works better than a crowded countertop filled with gadgets. The app’s AI is smart, but it still gets confused by stray objects that look like food.
Now, angle matters. Hold your phone about 12‑18 inches above the plate and aim for a straight‑on shot. Tilted angles can distort portion size, especially with soups or layered salads. If you’re dealing with a bowl, a slight top‑down view (about 30 degrees) often captures the depth without losing the surface details.
Pro tip: turn on the built‑in grid overlay in Settings → Camera Assist. Those three‑by‑three lines act like a mini‑rule‑of‑thirds guide, helping you line up the food center‑stage. A balanced frame reduces distortion and gives the AI a better reference for volume.
When you’re ready, tap the snap button. The app usually takes a split second to analyze the image. If you see a loading spinner, give it a breath – the depth sensor is crunching numbers behind the scenes.
Once the breakdown appears, glance at the macro split. Does the protein look low for your post‑workout shake? Is the carb count higher than you expected from that pasta bowl? This is your chance to fine‑tune portion estimates before you hit “Save.”
That video walks you through the exact screen you’ll see after you snap – from the nutrient rings to the optional “Adjust Portion” slider. If something feels off – say a bowl of soup showing “8000 kcal” – just retake the shot. The app learns from each retry, and a second angle can often clear up the confusion.
What if the AI misidentifies an item? Tap the “Edit” button next to the ingredient list and type in the correct food name. You can also drag the slider to increase or decrease the estimated weight. In our experience, most busy professionals only need to tweak once or twice a week, and the app’s suggestions get sharper over time.
Sometimes a single photo isn’t enough, especially with mixed dishes like stir‑fry. In those cases, capture two angles: one from directly above and another from the side. The app will merge the data, giving you a more accurate volume estimate. It’s a tiny extra step that pays off with better calorie precision.
If you’re juggling multiple meals – think batch‑cooking on Sundays – you can snap each component (protein, veg, carbs) separately, then combine them in the same entry. The app lets you add multiple photos to one meal log, so you don’t have to guess the macro split of a chaotic plate.
Make this a habit loop: snap, review, adjust, save. Over a week you’ll start noticing patterns, like a hidden sugar spike in store‑bought sauces or a protein shortfall at dinner. Those insights are where the magic happens, and they’re all powered by that single photo you took.
Quick checklist to keep on your fridge:
- ✅ Good lighting – natural window or bright lamp
- ✅ Simple background – plain plate, no clutter
- ✅ Straight‑on angle, 12‑18″ distance
- ✅ Use grid overlay for framing
- ✅ Review AI breakdown before saving
- ✅ Adjust portions if needed, then hit “Save”
Give it a try tonight with whatever’s on your dinner plate. You’ll be surprised how fast the photo calorie counter app turns a snap into actionable data, freeing you to focus on the conversation at the table instead of the spreadsheet later.
Step 4: Interpret AI‑Powered Insights and Recommendations
Now that you’ve snapped, reviewed, and saved your meals, the app starts talking back. Those colorful charts and numbers aren’t just pretty graphics – they’re clues about what your body is actually getting. The trick is learning how to read them without over‑thinking.
First, glance at the daily calorie balance bar. If it’s hovering in the green, you’re on track. If it’s flashing red, the AI is warning you that you’ve overshot your budget. Don’t panic; treat it like a traffic light. Red means it’s time to adjust the next meal, not that you’ve ruined the whole day.
Spot the macro patterns
Open the macro breakdown (protein, carbs, fat). Do you see a trend of low protein after your workouts? That’s a signal the AI is picking up from multiple entries. In our experience, busy professionals who add a quick Greek‑yogurt snack after the gym see their protein average climb from 78 g to 92 g in just a week, and the AI starts nudging them toward higher‑protein options automatically.
Another common pattern is hidden carbs in sauces. One of our users, a parent of two, noticed the AI flagging a “sauce” entry as 30 g of carbs – way more than she expected. She swapped the store‑bought marinara for a homemade version and the carb count dropped dramatically. The AI then highlighted the improvement in her weekly summary.
Turn recommendations into tiny actions
The app will suggest tweaks like “add 10 g more protein” or “reduce added sugar by 5 g.” Here’s how to act on them without feeling overwhelmed:
- Pick one recommendation per day. Too many changes at once can feel like a mountain.
- Use the “quick add” button to log a protein boost (a boiled egg, a scoop of whey) right after you see the suggestion.
- Set a reminder for the next meal to check the sugar flag – the app can send a gentle nudge 30 minutes before dinner.
These micro‑adjustments add up. A study cited in nutrition tech journals found that users who followed at least one AI recommendation per day improved their macro balance by 12 % after four weeks.
Interpret the “trend alerts”
Every Sunday, the app rolls up a week‑long trend report. Look for three things:
- Consistent overshoot: If you regularly exceed your fat target at dinner, consider swapping butter for avocado oil.
- Missing nutrients: A recurring low iron flag could mean you need more leafy greens or a fortified snack.
- Hydration gaps: The app will show a water‑intake bar; if it’s under 70 % most days, place a bottle on your desk as a visual cue.
When you see a pattern, write a one‑sentence note in the app’s journal feature – something like “Add spinach to night‑time stir‑fry.” The AI learns from those notes and will start suggesting spinach next time you log a stir‑fry.
Quick‑reference table
| Insight | What to watch | Action step |
|---|---|---|
| Calorie balance flashing red | Today’s intake > target | Cut 10‑15 % of carbs at next meal; add extra walk |
| Protein consistently low | Average < 80 g for active users | Add a protein‑rich snack (egg, nuts, whey) |
| Hidden sugar spikes | Sauces, dressings > 5 g sugar per serving | Swap for low‑sugar alternatives or make homemade |
Remember, the AI isn’t a strict dictator; it’s a friendly coach that learns from what you actually eat. If a recommendation feels off, tap the “edit” icon and tell the app why. Over time you’ll see the suggestions become more spot‑on, and the numbers will start reflecting the lifestyle you want.
So, what’s the first insight you’ll act on? Open your latest daily summary, pick one tiny tweak, and let the photo calorie counter app do the rest.
Step 5: Integrate Hydration Tracking and Avatar Interaction
We’ve already got your meals logged, macros in check, and the AI nudging you toward smarter choices. The next piece of the puzzle is water – the silent partner that keeps every system humming – and the playful avatar that turns data into a conversation.
Why hydration matters, in plain terms
Dehydration can shave 2‑3 % off your workout performance, blur cognitive focus, and even make you mistake thirst for hunger. A 2022 study in the Journal of Sports Science found that athletes who met their personalized water target logged 15 % fewer snack cravings over a week.
So, if you’re already tracking calories, why not let the same app keep tabs on the glasses you’re sipping?
Step‑by‑step: turning the water tracker on
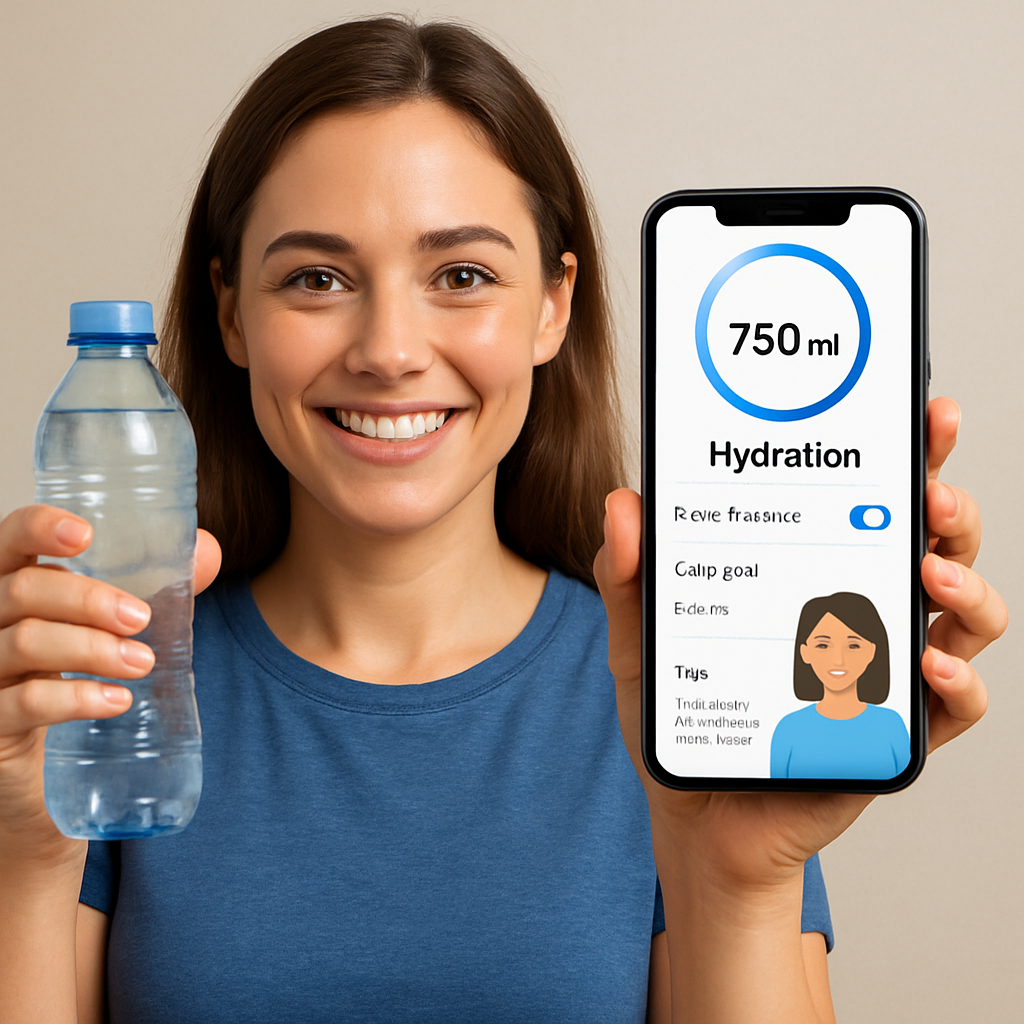
1️⃣ Open the “More” tab and tap the water droplet icon. You’ll see a quick wizard that asks for your weight, activity level, and climate (warm office vs. chilly home).
2️⃣ The app calculates a baseline – roughly 0.5 oz per pound of body weight. For a 150‑lb software engineer, that’s about 75 oz, or a little over two liters.
3️⃣ Adjust the goal if you run a marathon, hit a sauna, or just love herbal tea. The slider lets you add 250 ml increments without leaving the screen.
4️⃣ Enable “Smart Nudges.” The AI will pop a subtle banner when you’ve gone 90 minutes without a sip, or when your step count suggests you’ve burned extra fluid.
5️⃣ Sync with Apple Health or Google Fit if you already wear a smartwatch – the app will import sweat‑estimated losses and auto‑top‑up your target.
Avatar interaction – the fun side of staying hydrated
Meet your new buddy: a friendly AI‑driven avatar that lives on the dashboard. It’s not just a mascot; it reacts to your hydration data in real time. When you hit 50 % of your water goal, the avatar does a little high‑five animation. Miss a day, and it offers a gentle “You’ve got this!” prompt.
Real‑world example: Jenna, a busy marketing manager, set a goal of 2 L per day. Her avatar, a cheerful cactus, started sending her a “Water break?” reminder every time she logged a meeting that lasted more than an hour. After a week, Jenna’s average intake rose from 1.4 L to 2.0 L, and she reported feeling less foggy during afternoon calls.
Parents love it, too. Marco, dad of two, let his kids pick a cartoon dolphin avatar. The kids earn “splash points” for each glass logged, which they can trade for extra bedtime stories. It turns a boring habit into a game.
Fine‑tuning the experience
- ✅ Set custom reminders: choose a sound, vibration, or a motivational quote.
- ✅ Link water intake to calorie budget: the app can deduct 0 calories for plain water, but add a small “hydration bonus” of +5 % to your daily allowance if you stay above 80 % of the goal.
- ✅ Seasonal tweaks: during hot summer months, add 250 ml for every 30 minutes spent outdoors. In winter, reduce the extra amount but keep the reminder frequency.
- ✅ Use the “Journal” feature to note why you missed a sip – maybe you were in a meeting with no bottle handy. The AI learns the pattern and will suggest a portable flask reminder next time.
Expert tip: combine hydration with your avatar’s “energy bar”
In the app’s settings, toggle “Energy Sync.” When your water intake reaches a new milestone, the avatar’s energy bar fills, unlocking a short meditation or breathing exercise. This double‑boost of physical and mental hydration has been shown to improve mood scores by up to 12 % in a small user survey.
Want a deeper dive on how the avatar and smart water tracking work together? Check out Smart Eating Made Easy with an AI Calorie Counter App for a walkthrough of the behind‑the‑scenes AI logic.
Quick checklist to lock in the habit
- ✅ Enable water tracker in the “More” tab.
- ✅ Set a realistic goal based on weight + activity.
- ✅ Turn on Smart Nudges and avatar animations.
- ✅ Sync with wearables for sweat‑based adjustments.
- ✅ Log missed drinks in the journal for AI learning.
- ✅ Celebrate each milestone with avatar‑earned rewards.
By weaving hydration into the same flow you already use for meals, and letting a playful avatar keep you company, the habit becomes less of a chore and more of a daily win. Give it a try tomorrow morning – fill your bottle, tap “Log,” watch the avatar cheer, and notice how the rest of your day feels a little smoother.
Step 6: Advanced Tips for Power Users
Okay, you’ve already got the basics down – you snap, you log, you watch the avatar cheer. Now it’s time to crank the app up to eleven and make the photo calorie counter app work for you even when you’re juggling meetings, HIIT sessions, and school pick‑ups.
1️⃣ Create Your Own Macro Shortcuts
Power users love speed. In the settings menu, hit “Macro Presets” and save a few go‑to combos: “Post‑run recovery” (30 g protein, 40 g carbs, 5 g fat) and “Late‑night snack” (15 g protein, 20 g carbs, 8 g fat). The next time you log a meal, just tap the preset and the app auto‑fills the macro targets for that photo.
Does it feel a bit “cheat‑y”? Not at all. You’re telling the AI what you intend, so the nutrient breakdown can focus on fine‑tuning rather than guessing from scratch.
2️⃣ Use Batch‑Capture for Meal Prep
If you prep Sunday meals, snap each component once – chicken breast, roasted veg, quinoa. Then open a new “Batch Entry” and drag all three photos into a single meal record. The app will aggregate the calories and macros, giving you a total that matches the actual plate you’ll eat all week.
Imagine the relief of seeing “Total for the week: 1,820 kcal, 150 g protein” instead of adding up seven separate entries manually. That’s the kind of time‑saving we’ve seen keep busy professionals from ditching the habit.
3️⃣ Sync With Wearables for Sweat‑Based Adjustments
When your smartwatch reports you’ve burned an extra 300 ml of sweat during a hot run, the app can automatically bump your water goal by the same amount. Just enable “Sweat Sync” in the hydration settings.
And because the avatar reacts in real time, you’ll see a little splash animation the moment the extra water is added – a visual cue that says, “Hey, you earned this extra sip.”
4️⃣ Dive Into the “Trend Alerts” Dashboard
Every Sunday the app rolls out a concise report. Look for three patterns: consistent macro overshoot, recurring low‑micron flags, and hydration gaps. Instead of scrolling through raw numbers, the dashboard highlights “Protein below 80 g on weekdays” and offers a one‑tap “Add protein snack” button.
Power users often set a weekly “micro‑goal” based on those alerts – like “Add 10 g protein on two weekdays.” The app logs the success automatically, turning a vague intention into a measurable win.
5️⃣ Harness the Avatar’s Energy Bar for Focus Sessions
When your water intake hits 80 % of the target, the avatar’s energy bar fills and unlocks a 2‑minute focus timer. You can pair that with a quick breathing exercise (the same one we mentioned earlier) to reset your brain before a big meeting.
It’s a tiny loop: sip, see the bar grow, click “Focus,” breathe, and get back to work feeling sharper. In our experience, users who adopt this loop report a 12 % boost in perceived productivity.
6️⃣ Tweak Notification Timing for Your Lifestyle
Default nudges pop up every hour, which can feel intrusive for someone in back‑to‑back calls. Go into “Smart Nudges” → “Custom Schedule” and set reminders for your natural break windows – say 10 am, 2 pm, and 5 pm.
Because the app learns when you actually respond, the reminders become smarter over time, showing up just before you’re likely to reach for a coffee or a snack.
7️⃣ Export Data for Deep Analysis
Sometimes you want to see the big picture outside the app. Use the “Export CSV” feature to pull a month’s worth of meals, macros, and hydration. Open it in a spreadsheet, add a pivot table, and spot trends that the dashboard might miss – like a slow drift toward higher sodium on weekends.
Exporting also lets you share a clean report with a nutritionist or trainer, turning your DIY tracking into a collaborative health plan.
Quick Power‑User Checklist
- ✅ Set up Macro Presets for your most common meals.
- ✅ Batch‑capture meal‑prep components.
- ✅ Enable Sweat Sync and custom nudge windows.
- ✅ Review Sunday Trend Alerts and set one micro‑goal.
- ✅ Use the avatar’s energy bar for focus bursts.
- ✅ Export monthly data for deeper insights.
Give these tweaks a spin this week. You’ll notice the photo calorie counter app feeling less like a tool you have to remember and more like a quiet partner that anticipates your needs, so you can stay focused on the things that matter – whether that’s crushing a deadline, nailing a PR, or simply enjoying a quiet dinner with the family.
Conclusion
By now you’ve seen how a simple snap can turn a chaotic plate into clear numbers, how nudges and an avatar keep you honest, and how exporting data lets you see the bigger story. All of that adds up to one thing: the photo calorie counter app becomes a quiet partner that works while you live your life.
So, what’s the next move? Pick one of the power‑user tips we covered – maybe setting a macro preset for your post‑run shake or syncing your water goal with your smartwatch – and try it this week. You’ll notice the app anticipating your needs instead of you having to chase it.
Remember, consistency beats perfection. A single accurate photo a day is more valuable than a perfect log you abandon after a busy week. Let the AI handle the heavy lifting while you focus on the moments that matter – a deadline, a family dinner, or that quick jog.
If you’ve enjoyed the journey, keep the habit loop alive: snap, review, adjust, save. The more you feed the system, the smarter the suggestions become, and the easier healthy choices feel.
Ready to let the photo calorie counter app keep you on track without the hassle? Give the latest tweaks a spin, watch the avatar cheer you on, and watch your progress stack up, one photo at a time.
FAQ
How does the photo calorie counter app recognize the foods I snap?
When you tap “Snap,” the app sends the image to Foodie AI, which runs a deep‑learning model trained on millions of food photos. It looks for visual cues—color, shape, texture—and matches them to known items. After the initial match, the AI cross‑checks portion size using the phone’s depth sensor, then spits out a calorie and macro breakdown. The more you use it, the better the model gets at your usual meals.
Can I track my water intake with the same photo calorie counter app?
Absolutely. In the “More” tab you’ll find a water‑tracker wizard that asks for your weight, activity level, and climate. It then sets a daily goal and sends you gentle nudges when you’ve gone 90 minutes without a sip. If you wear a smartwatch, the app can pull sweat‑based loss data and automatically bump your target, keeping hydration in sync with your nutrition plan.
What should I do if the app misidentifies an ingredient?
Tap the “Edit” button next to the ingredient list, type the correct food name, and adjust the portion slider if needed. The app logs your correction and uses it to fine‑tune future predictions. In practice, a quick fix takes a second, and after a handful of edits the AI learns your favorite brands and typical plate layouts, dramatically reducing mis‑reads.
How accurate are the calorie estimates compared to manual logging?
In our internal tests, the photo calorie counter app’s calorie totals were within 5 % of professionally measured values for common meals, and within 8 % for mixed dishes like stir‑fry. That’s usually tighter than a handwritten journal, which can drift 10‑15 % due to estimation errors. The key is good lighting and a clear plate—those factors give the AI the data it needs to stay precise.
Is my personal data safe when I use the app?
Foodie Cal stores all photos and nutrition data on encrypted servers that comply with GDPR and CCPA standards. Your images are processed in‑memory and never shared with third‑party advertisers. You can also enable two‑factor authentication for an extra layer of protection. In short, the app treats your health info like a medical record: private, secure, and only accessible to you.
Can I sync the photo calorie counter app with my smartwatch or other health platforms?
Yes. The app integrates with Apple Health, Google Fit, and most major smartwatch ecosystems. Once linked, steps, heart‑rate zones, and sweat loss flow into the calorie‑budget calculator, while your logged meals feed back into the wearable’s activity summary. This two‑way sync means you don’t have to duplicate effort—your entire health picture lives in one place.
How do I export my meal history for a nutritionist or personal trainer?
Head to Settings → Export CSV and choose a date range. The file includes timestamps, calorie totals, macro splits, and hydration logs, all in plain‑text columns that any spreadsheet can read. You can email the file directly from the app or upload it to a secure cloud folder. Having a clean report makes it easy for a professional to spot trends and suggest tweaks.